“Spring gel nail art at home
The season of blooming flowers, warmer weather, and longer days is the perfect time to refresh your beauty routine and try out new nail art designs. In this article, we’ll explore the world of spring gel nail art at home, providing you with the tips, tricks, and inspiration you need to create stunning and stylish nail designs that capture the essence of the season.
Why Gel Nail Art?
Gel nail art has become increasingly popular in recent years, and for good reason. The use of gel polish allows for a long-lasting, high-gloss finish that can withstand the wear and tear of daily life. Unlike traditional nail polish, gel polish is cured under a UV or LED light, creating a durable and chip-resistant finish that can last up to two weeks. This makes it the perfect choice for those who want to achieve salon-quality nail art at home without the need for frequent touch-ups.
Preparing Your Nails for Spring Gel Nail Art
Before you begin creating your spring gel nail art design, it’s essential to prepare your nails properly. This includes:
- Cleaning and shaping your nails: Use a nail cleanser to remove any oils or residue from your nails, and shape them to your desired shape using a nail file.
- Applying a base coat: Apply a clear gel base coat to protect your nails and promote adhesion.
- Prepping your nail surface: Use a buffer to gently buff the surface of your nails, creating a smooth canvas for your nail art design.
Spring Gel Nail Art Ideas

Now that your nails are prepped and ready, it’s time to get creative! Here are some spring-inspired gel nail art ideas to try at home:
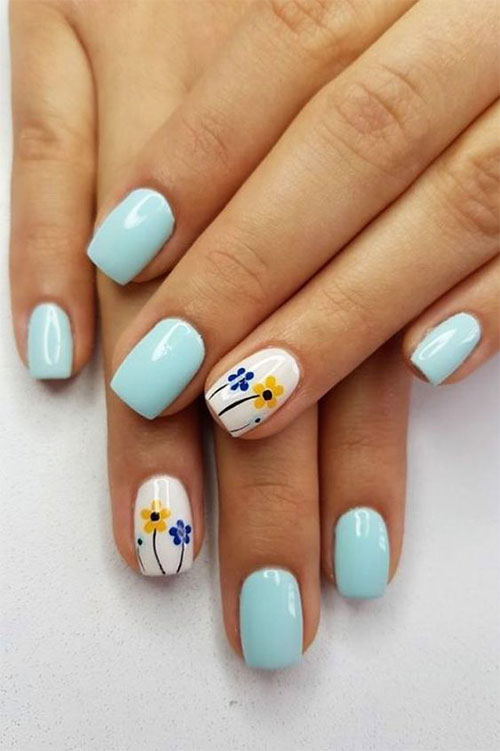
- Floral Patterns: Create a beautiful floral pattern using pastel shades of pink, yellow, and blue. Use a small nail art brush to paint on delicate flowers and leaves.
- Rainbow Colors: Celebrate the arrival of spring with a vibrant rainbow-colored nail design. Use a gel polish in a range of bright colors, gradating from one color to the next to create a stunning ombre effect.
- Butterfly Wings: Add a touch of whimsy to your nail design with a butterfly wing-inspired pattern. Use a combination of pink, purple, and blue gel polish to create a beautiful, intricate design.
- Spring Leaves: Welcome the arrival of spring with a nail design featuring delicate spring leaves. Use a combination of green and yellow gel polish to create a beautiful, realistic leaf pattern.
- Pastel Colors: Soft, pastel colors are a hallmark of spring gel nail art. Try pairing pale shades of pink, blue, and yellow for a sweet and feminine nail design.

Step-by-Step Guide to Creating Spring Gel Nail Art at Home
Creating spring gel nail art at home is easier than you think. Here’s a step-by-step guide to get you started:

- Apply a base coat: Apply a clear gel base coat to each of your nails, making sure to cover the entire nail surface.
- Choose your gel polish colors: Select the gel polish colors you want to use for your nail design. Make sure to choose colors that are specifically designed for gel nail art.
- Create your design: Use a small nail art brush to paint on your design. Start with the main elements of your design, such as the flowers or leaves, and then add details and shading as needed.
- Add a top coat: Once you’ve completed your design, apply a clear gel top coat to seal and protect your nail art.
- Cure your nails: Use a UV or LED light to cure your nails, following the manufacturer’s instructions for the recommended curing time.
Tips and Tricks for Creating Spring Gel Nail Art at Home
Here are some tips and tricks to help you achieve salon-quality spring gel nail art at home:
- Use a nail art brush: A small nail art brush is essential for creating intricate details and patterns in your nail design.
- Practice makes perfect: Don’t be discouraged if your first attempts at gel nail art don’t turn out as expected. Practice makes perfect, so keep trying until you achieve the look you want.
- Use a nail cleanser: Use a nail cleanser to remove any oils or residue from your nails before applying your gel polish.
- Work in thin layers: Apply your gel polish in thin layers, allowing each layer to cure before adding the next. This will help prevent pooling and unevenness.
- Seal with a top coat: Always seal your nail art with a clear gel top coat to protect your design and extend its wear.
Common Mistakes to Avoid
When creating spring gel nail art at home, there are a few common mistakes to avoid:
- Applying too much gel polish: Applying too much gel polish can lead to a thick, uneven finish. Work in thin layers to achieve a smooth, even finish.
- Not curing your nails properly: Failing to cure your nails properly can lead to a weak, chip-prone finish. Always follow the manufacturer’s instructions for the recommended curing time.
- Not using a base coat: Failing to apply a base coat can lead to staining and uneven adhesion. Always apply a clear gel base coat before starting your nail design.
- Not cleaning your nails properly: Failing to clean your nails properly can lead to a dirty, uneven finish. Always use a nail cleanser to remove any oils or residue from your nails before applying your gel polish.
Conclusion
Creating spring gel nail art at home is a fun and creative way to welcome the arrival of the new season. With the right tools, techniques, and inspiration, you can achieve salon-quality nail art that captures the essence of spring. Remember to practice makes perfect, and don’t be discouraged if your first attempts don’t turn out as expected. With time and patience, you’ll be creating beautiful, long-lasting spring gel nail art designs that will make you the envy of all your friends. So why not give it a try? Get creative, have fun, and happy nail art-ing!


