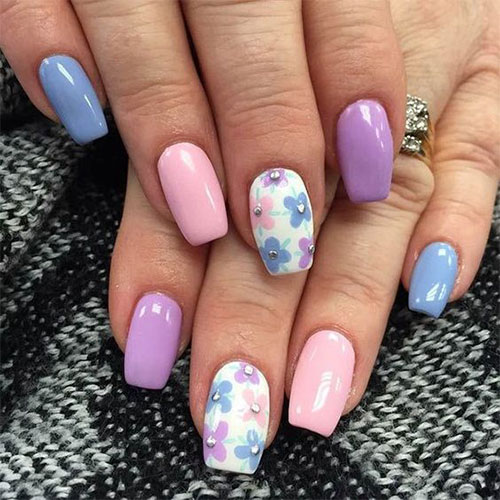
“Easy flower nail art for spring
Floral nail designs are a timeless and elegant way to add some personality to your nails, and with the right techniques and tools, you can achieve salon-quality results at home. In this article, we’ll take you through some easy flower nail art designs for spring, including step-by-step tutorials and expert tips to help you get started.

Why Choose Flower Nail Art for Spring?
Flower nail art is a classic choice for spring, and for good reason. The season is all about new beginnings, growth, and renewal, and what better way to represent that than with a beautiful floral design? From delicate cherry blossoms to vibrant tulips, flower nail art can add a touch of whimsy and elegance to your nails. Plus, with the right colors and techniques, you can create a design that’s both on-trend and uniquely yours.
Materials Needed
Before you start, make sure you have the following materials:
- Nail polish in a range of spring-inspired colors (pastels, brights, and neutrals)
- Nail art brushes (various sizes)
- Nail dotting tool or toothpick
- Nail guides or stickers (optional)
- Base coat and top coat
- Nail cleanser and lint-free wipes

Easy Flower Nail Art Designs for Spring
Here are five easy flower nail art designs for spring, each with a step-by-step tutorial:
1. Simple Daisy Nail Art
This classic design is perfect for spring and can be customized with your favorite colors.
Step-by-Step Tutorial:
- Apply a base coat to your nails and let it dry.
- Paint a white or light-colored background on each nail using a nail polish brush.
- Using a dotting tool or toothpick, create the center of the daisy by applying a small dot of yellow or gold polish.
- Use a nail art brush to paint the petals of the daisy, starting from the center and working your way outwards. Use a gentle, sweeping motion to create soft, curved lines.
- Add some depth to the design by applying a second layer of petals in a slightly darker shade.
- Finish with a top coat and apply a small dot of polish to the center of the daisy to create a 3D effect.

2. Cherry Blossom Nail Art
This delicate design is perfect for spring and can be customized with your favorite pink or peach shades.
Step-by-Step Tutorial:
- Apply a base coat to your nails and let it dry.
- Paint a light pink or peach background on each nail using a nail polish brush.
- Using a nail art brush, create the branches of the cherry blossom tree by painting thin, curved lines in a dark brown or black polish.
- Add some blooms to the branches by painting small, delicate flowers in a light pink or peach polish. Use a dotting tool or toothpick to create the center of each flower.
- Add some leaves to the design by painting small, teardrop-shaped leaves in a dark green polish.
- Finish with a top coat and apply a small dot of polish to the center of each flower to create a 3D effect.
3. Tulip Nail Art
This vibrant design is perfect for spring and can be customized with your favorite bright colors.
Step-by-Step Tutorial:
- Apply a base coat to your nails and let it dry.
- Paint a bright, vibrant background on each nail using a nail polish brush. Choose a color that complements the tulip design, such as a soft green or blue.
- Using a nail art brush, create the tulip by painting a large, cup-shaped flower in a bright, bold color.
- Add some depth to the design by applying a second layer of petals in a slightly darker shade.
- Add some leaves to the design by painting small, teardrop-shaped leaves in a dark green polish.
- Finish with a top coat and apply a small dot of polish to the center of the tulip to create a 3D effect.
4. Floral Wreath Nail Art
This elegant design is perfect for spring and can be customized with your favorite flowers and colors.
Step-by-Step Tutorial:
- Apply a base coat to your nails and let it dry.
- Paint a light-colored background on each nail using a nail polish brush.
- Using a nail art brush, create the wreath by painting a circle of flowers and leaves in a light, airy color.
- Add some depth to the design by applying a second layer of flowers and leaves in a slightly darker shade.
- Use a dotting tool or toothpick to create the centers of the flowers and add some texture to the design.
- Finish with a top coat and apply a small dot of polish to the center of each flower to create a 3D effect.
5. Mini Floral Nail Art
This delicate design is perfect for spring and can be customized with your favorite small flowers and colors.
Step-by-Step Tutorial:
- Apply a base coat to your nails and let it dry.
- Paint a light-colored background on each nail using a nail polish brush.
- Using a nail art brush, create a small, delicate flower in a light, airy color. Choose a simple design, such as a small daisy or violet.
- Add some depth to the design by applying a second layer of petals in a slightly darker shade.
- Use a dotting tool or toothpick to create the center of the flower and add some texture to the design.
- Finish with a top coat and apply a small dot of polish to the center of the flower to create a 3D effect.
Tips and Tricks
Here are some expert tips and tricks to help you achieve salon-quality results at home:
- Use a base coat to protect your nails and help the polish adhere.
- Choose a polish that’s specifically designed for nail art, as it will be thicker and easier to work with.
- Use a nail art brush to create fine lines and details, and a dotting tool or toothpick to create small dots and textures.
- Experiment with different colors and techniques to find the look that works best for you.
- Don’t be afraid to make mistakes – they can often be fixed with a little nail polish remover and some creativity.
Conclusion
Easy flower nail art for spring is a great way to add some personality and style to your nails. With the right materials and techniques, you can create beautiful, salon-quality designs at home. Whether you’re a beginner or an experienced nail artist, these step-by-step tutorials and expert tips will help you get started and achieve the look you want. So why not give it a try? With a little practice and patience, you can create stunning flower nail art designs that will make your nails stand out this spring.


