“Floral acrylic nails for spring
Spring is all about new beginnings, and what better way to celebrate than with a beautiful set of floral acrylic nails? In this article, we’ll take you on a journey to explore the world of floral acrylic nails, from the latest trends to step-by-step guides on how to achieve the perfect look.

Why Choose Floral Acrylic Nails for Spring?
Floral acrylic nails are a classic choice for spring, and for good reason. The delicate, intricate designs and soft color palette evoke the feeling of a blooming garden, perfect for the season of renewal. Whether you’re looking for a subtle, natural look or a bold, statement-making design, floral acrylic nails offer endless possibilities.
One of the biggest advantages of floral acrylic nails is their versatility. From dainty, minimalist designs to elaborate, 3D masterpieces, the options are endless. You can choose from a wide range of colors, from soft pastels to vibrant brights, and experiment with different shapes, sizes, and textures to create a look that’s uniquely yours.
Latest Trends in Floral Acrylic Nails
This spring, some of the hottest trends in floral acrylic nails include:
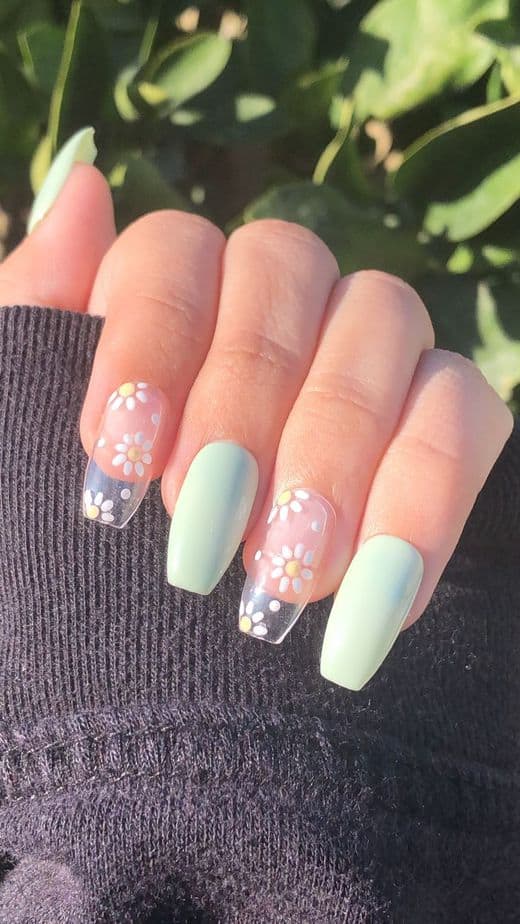
- Delicate watercolor designs: Soft, dreamy watercolor effects are taking over the nail art scene, with delicate, abstract floral patterns in pastel shades.
- 3D flower accents: Add some extra drama to your nail look with 3D flower accents, which can be made using acrylic, gel, or even real flowers.
- Negative space designs: Negative space designs are all about letting the natural nail shine through, with delicate floral patterns and abstract shapes created using negative space techniques.
- Glitter and holographic accents: Add some extra sparkle to your floral acrylic nails with glitter and holographic accents, which can be used to create bold, eye-catching designs.
How to Create Floral Acrylic Nails at Home
While it’s always recommended to consult a professional nail technician for intricate designs, you can still achieve beautiful floral acrylic nails at home with a few simple tools and some practice. Here’s a step-by-step guide to get you started:
Materials needed:
- Acrylic nail kit
- Nail glue
- Nail tips or forms
- Acrylic powder and liquid
- Nail art brushes
- Paints and pigments
- Top coat and base coat


Step-by-Step Instructions:
- Prep your nails: Start by prepping your natural nails, shaping and buffing them to create a smooth surface for your acrylics.
- Apply nail tips or forms: Apply nail tips or forms to create the shape and length you desire.
- Mix and apply acrylic: Mix your acrylic powder and liquid to create a workable consistency, then apply to your nail using a nail art brush.
- Shape and smooth: Use a nail file and buffer to shape and smooth out your acrylic nails.
- Create your design: Use nail art brushes and paints to create your floral design, starting with a base coat and building up layers of color and detail.
- Seal with top coat: Finish with a top coat to seal and protect your design.
Tips and Tricks for Creating Beautiful Floral Acrylic Nails
To create truly stunning floral acrylic nails, here are a few tips and tricks to keep in mind:
- Use reference images: Collect reference images of floral designs you love to inspire your own creations.
- Experiment with color: Don’t be afraid to experiment with different color combinations and techniques to create unique, one-of-a-kind designs.
- Practice, practice, practice: As with any skill, practice makes perfect when it comes to creating floral acrylic nails.
- Invest in quality tools: Invest in good-quality nail art brushes, paints, and other tools to ensure your designs look professional and polished.
- Take your time: Creating beautiful floral acrylic nails takes time and patience, so don’t rush the process.
Common Mistakes to Avoid When Creating Floral Acrylic Nails
To avoid common mistakes and ensure your floral acrylic nails turn out beautifully, here are a few things to watch out for:
- Inconsistent acrylic application: Make sure to apply your acrylic evenly and consistently to avoid uneven surfaces.
- Insufficient curing time: Allow your acrylic to cure fully before shaping and filing to avoid damaging the nail.
- Poor nail preparation: Make sure to prep your natural nails properly before applying acrylics to ensure a strong, long-lasting bond.
- Lack of detail: Don’t be afraid to add detail and dimension to your design – it’s the little things that make floral acrylic nails truly special.
- Improper top coat application: Apply a thin, even layer of top coat to seal and protect your design, avoiding pooling or streaking.
Conclusion
Floral acrylic nails are a beautiful and timeless choice for spring, offering endless possibilities for creativity and self-expression. With the right tools, techniques, and practice, you can create stunning, professional-looking designs that will make you feel confident and gorgeous. Whether you’re a seasoned nail art enthusiast or just starting out, we hope this guide has inspired you to try your hand at floral acrylic nails and welcome the new season in style. So why not give it a try? With a little patience and practice, you’ll be on your way to creating beautiful, show-stopping floral acrylic nails that will make you the envy of all your friends. Happy decorating!


