“At-home spring manicure guide
One of the best ways to welcome the new season is with a refreshing at-home spring manicure. In this guide, we’ll take you through a step-by-step process to help you achieve salon-quality nails from the comfort of your own home.

Why an At-Home Manicure?
Before we dive into the nitty-gritty of the manicure process, let’s talk about why an at-home manicure is a great idea. For one, it’s cost-effective. Instead of spending money on a professional manicure, you can invest in a few key tools and products to get the job done at home. Plus, with an at-home manicure, you can take your time and work at your own pace, ensuring that every detail is perfect.
Another benefit of an at-home manicure is that you can customize it to your liking. Whether you’re in the mood for a bold, bright color or a more subtle, natural look, you’re in control. And, with the convenience of doing it at home, you can even re-do your nails as often as you like, without breaking the bank.
Gather Your Supplies
Before you start, make sure you have all the necessary supplies on hand. Here’s a list of what you’ll need:
- Nail polish remover
- Nail clippers
- Cuticle pusher or orange stick
- Cuticle nippers (optional)
- Nail file or emery board
- Buffer
- Base coat
- Nail polish (choose your favorite spring color!)
- Top coat
- Nail polish clean-up brush
- Cotton balls or pads
- Nail art brushes (optional)
Prep Your Nails

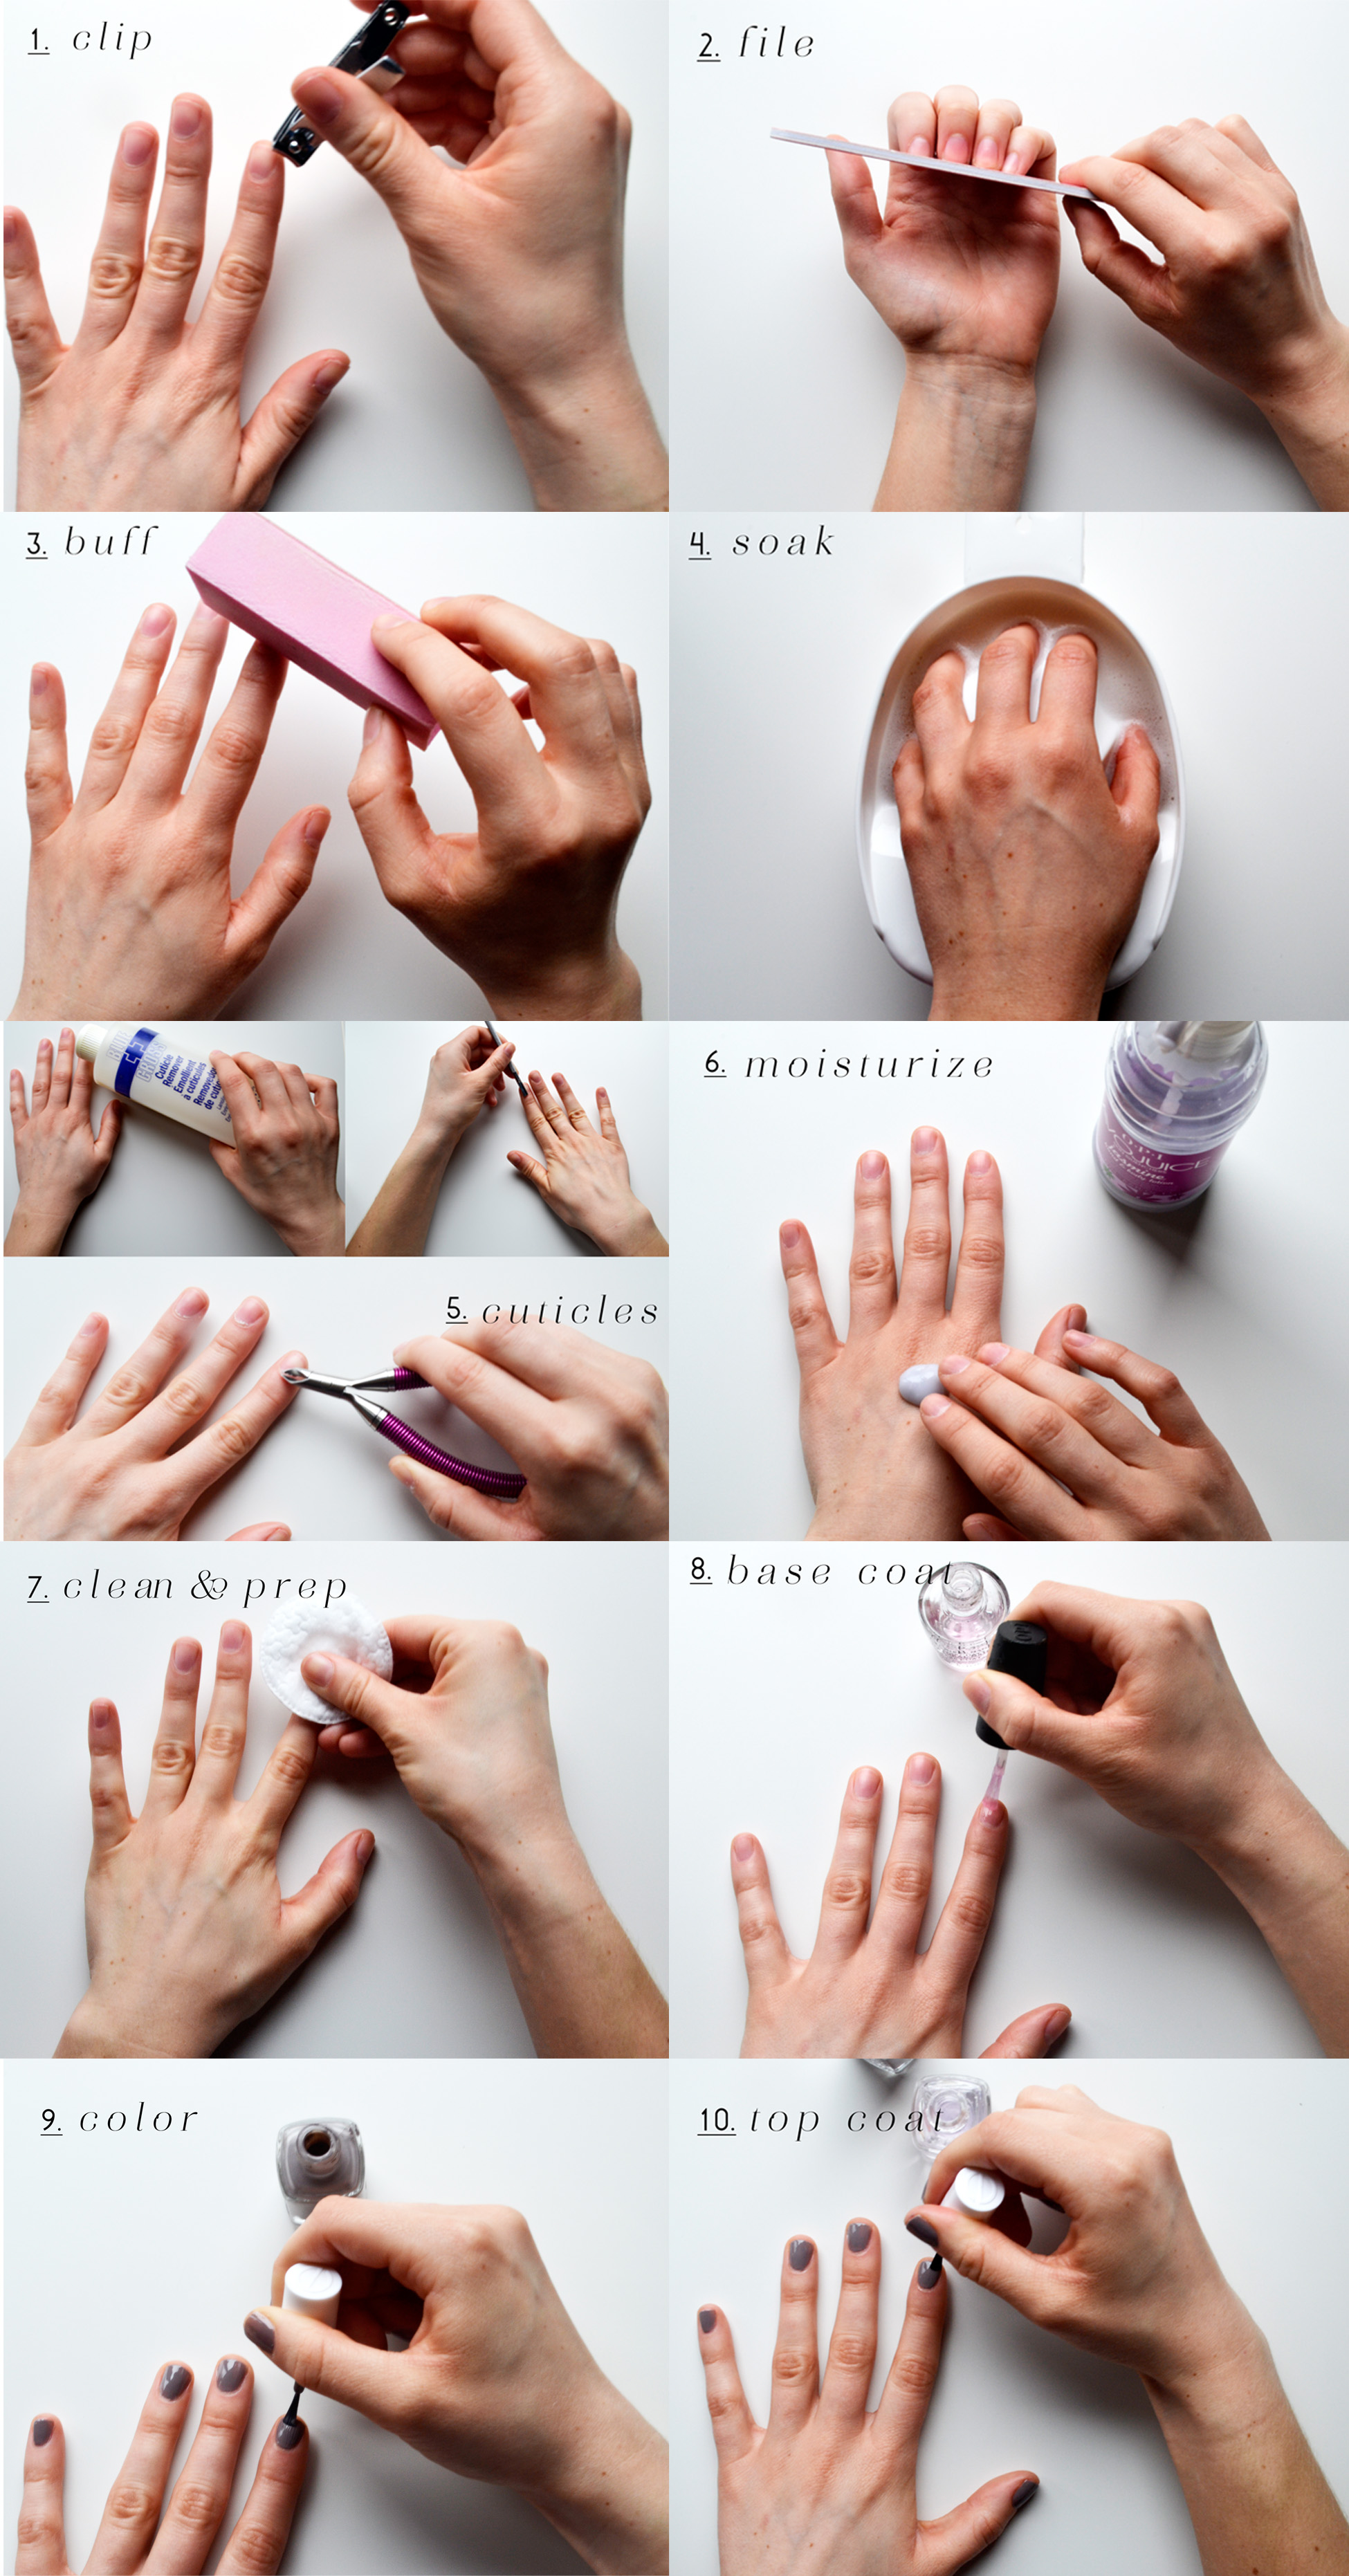
The first step in any manicure is to prep your nails. Start by removing any old nail polish with a nail polish remover. You can use a cotton ball or pad soaked in remover to gently wipe away the old color.
Next, use nail clippers to trim and shape your nails. Be careful not to cut too short, as this can be painful and lead to bleeding. For a spring-inspired look, consider a shorter, more rounded nail shape.
Soften Your Cuticles
Now it’s time to soften your cuticles. Soak your fingers in a bowl of warm water for a few minutes to loosen the cuticles. You can also add a few drops of cuticle oil or soap to the water for extra moisturizing power.
Once your cuticles are soft, use a cuticle pusher or orange stick to gently push back the cuticles. Be careful not to push too hard, as this can be painful and cause bleeding. If you have particularly stubborn cuticles, you can use cuticle nippers to carefully trim them.
Shape and Smooth Your Nails
With your cuticles softened and pushed back, it’s time to shape and smooth your nails. Use a nail file or emery board to gently shape your nails, following the natural curve of your finger.
Next, use a buffer to smooth out any ridges or imperfections. Start with a coarse buffer and work your way up to a finer buffer for a high-shine finish.
Apply Your Base Coat
Now it’s time to start applying your nail polish. Begin with a clear base coat to protect your nails and create a smooth surface for your polish to adhere to. Apply a thin layer, making sure to cover the entire nail surface.
Choose Your Spring Color
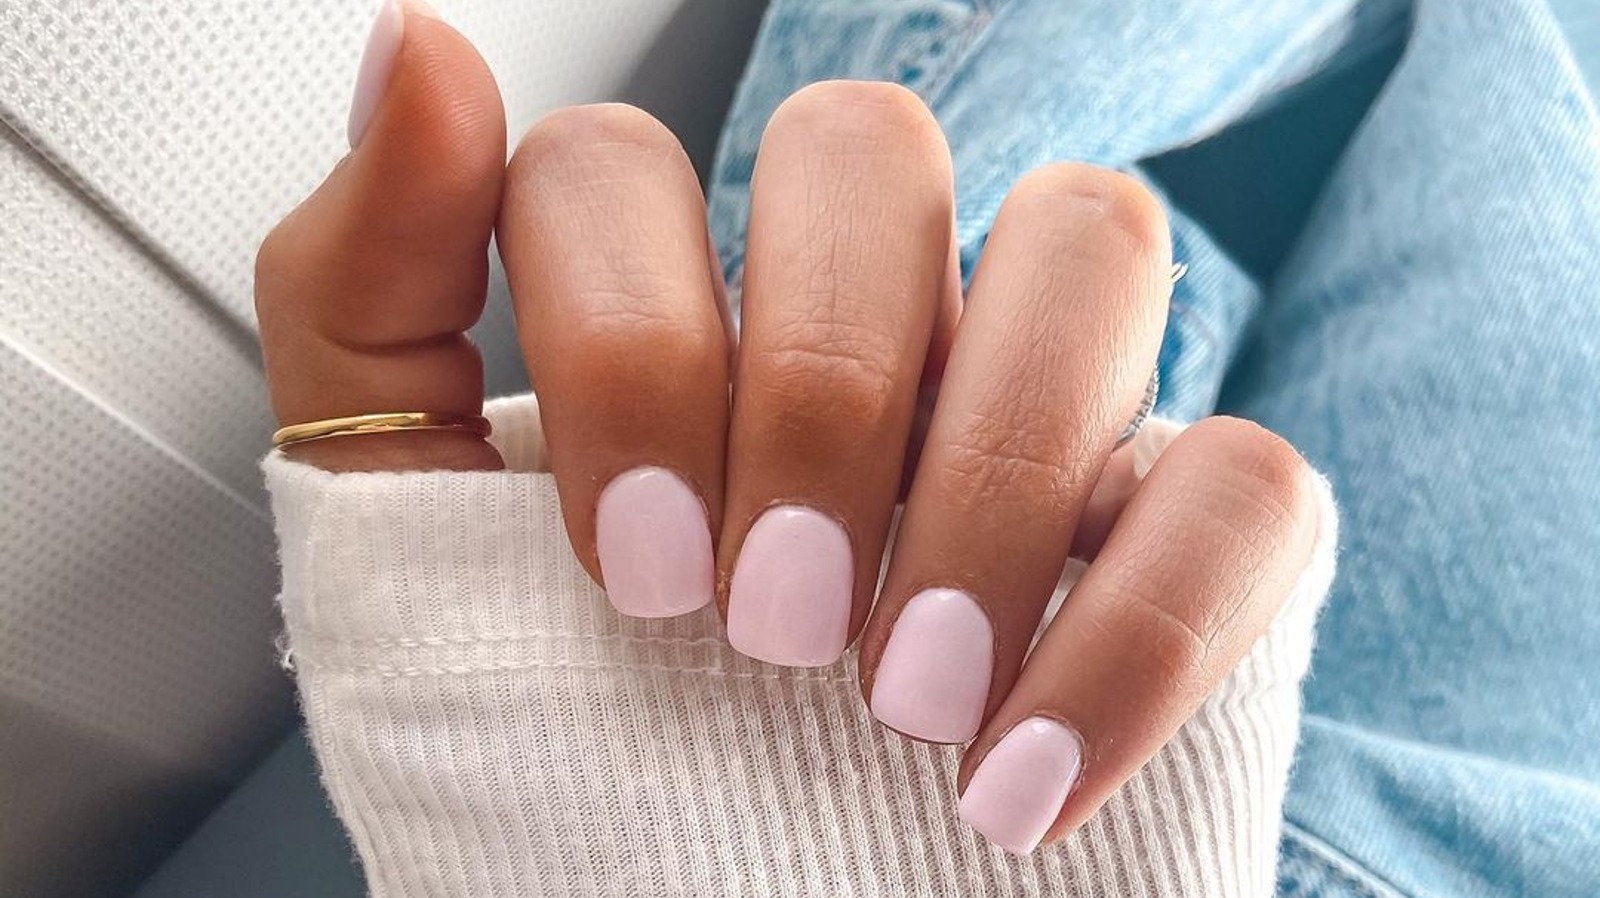
The fun part! Choose your favorite spring-inspired color and apply a thin layer to each nail. Consider a pastel shade, such as pale pink or baby blue, for a soft, feminine look. Or, go bold with a bright coral or yellow for a more statement-making manicure.
Add a Top Coat
Once your polish is dry, apply a thin layer of clear top coat to seal in the color and add a glossy finish. This will also help extend the wear of your manicure and prevent chipping.
Clean Up
The final step in your at-home spring manicure is to clean up any mistakes or smudges. Use a nail polish clean-up brush dipped in nail polish remover to carefully wipe away any excess polish or mistakes.
Add Some Spring-Inspired Nail Art (Optional)
If you’re feeling extra creative, consider adding some spring-inspired nail art to your manicure. Use nail art brushes and a dotting tool to create cute designs, such as:
- Tiny flowers or blossoms
- Leaf patterns or branches
- Pastel-colored stripes or dots
- A simple, bold "Hello, Spring!" message
Tips and Tricks
Here are a few tips and tricks to keep in mind when giving yourself an at-home spring manicure:
- Make sure to moisturize your hands and cuticles after your manicure to keep them hydrated and healthy.
- Use a nail polish that is free of harsh chemicals, such as formaldehyde, toluene, and DBP (dibutyl phthalate).
- Consider using a nail polish with a built-in base coat or top coat to streamline the process.
- If you’re new to at-home manicures, start with a simple, one-color design and gradually experiment with more complex nail art.
- Don’t be too hard on yourself if your manicure isn’t perfect – it’s all about having fun and enjoying the process!
Spring Manicure Inspiration
Need some inspiration for your at-home spring manicure? Here are a few ideas to get you started:
- Pastel rainbow: Create a colorful, ombre-inspired look with pastel shades of pink, blue, yellow, and green.
- Floral fantasy: Use nail art brushes to create intricate floral patterns, complete with tiny flowers, leaves, and stems.
- Spring stripes: Add a pop of color with bold, horizontal stripes in shades of coral, turquoise, or yellow.
- Garden party: Create a whimsical, garden-inspired look with nail art featuring tiny bees, butterflies, or ladybugs.
Conclusion
With these simple steps and tips, you’re ready to give yourself a beautiful at-home spring manicure. Whether you’re in the mood for a bold, bright color or a more subtle, natural look, the options are endless. So why not get creative, grab your favorite nail polish, and welcome the new season with a fresh, fabulous manicure? Happy spring, and happy pampering!