“Spring nails you can do yourself
It’s a time of renewal, a season of shedding the old and embracing the new. And what better way to celebrate this transformation than with a fresh new look for your nails? In this article, we’ll explore the world of spring nails, focusing on gorgeous, easy-to-create designs that you can do yourself at home.

Preparation is Key
Before diving into the world of spring nail art, it’s essential to prepare your nails. Start by removing any old nail polish and washing your hands to ensure a clean slate. Next, gently push back your cuticles and trim any excess skin. Use a buffer to smooth out ridges and imperfections on the nail surface, creating a smooth canvas for your design. Finish off by applying a clear base coat to protect your nails and promote polish adhesion.
Spring-Inspired Nail Colors
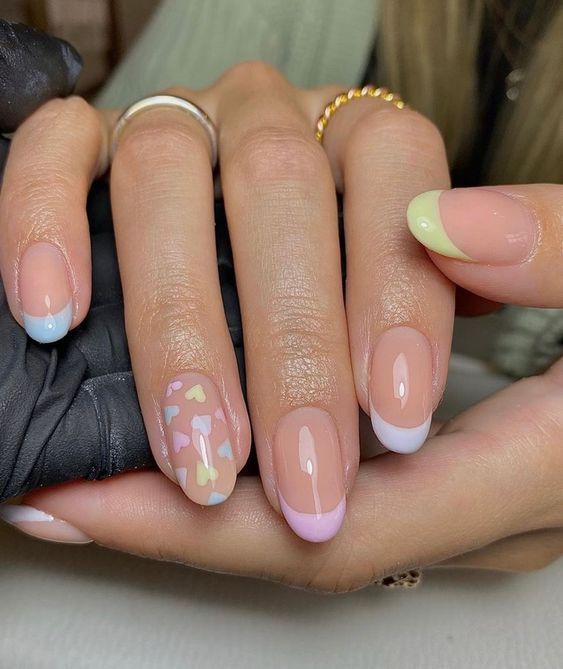
Spring is all about pastel hues, bright florals, and soft, sunny colors. Here are some must-try shades for the season:
- Soft Peach: A warm, inviting shade reminiscent of blooming flowers and ripe fruit.
- Minty Fresh: A calming, pale green that evokes the feeling of a spring morning.
- Lavender Dream: A soft, soothing purple that’s perfect for creating a whimsical, garden-inspired look.
- Coral Reef: A vibrant, poppy pink that’s sure to add a splash of color to your nail look.
- Sunshine Yellow: A bright, cheerful shade that’s guaranteed to put a smile on your face.

Simple Spring Nail Art Designs
You don’t have to be a skilled nail artist to create stunning spring-inspired designs. Here are a few easy-to-recreate ideas to get you started:
- Floral Accent Nail: Paint a single nail with a bold, bright color, and use a dotting tool or a toothpick to create a small floral pattern. Add a few strategically-placed dots in a contrasting color to resemble the center of a flower.
- Striped Delight: Alternate between two or three pastel shades to create a striped effect. You can use nail guides or stickers to help you achieve straight, even lines.
- Daisy Chain: Use a white or light-colored polish to create a series of small daisies on each nail. Add a yellow center to each flower using a dotting tool or a small brush.
- Polka Dot Fun: Create a playful, whimsical look by applying small dots of polish in a random pattern. You can use a single color or mix and match different shades for a more eclectic look.
More Complex Spring Nail Art Designs

If you’re feeling adventurous and want to try your hand at more intricate designs, here are a few ideas to inspire you:
- Watercolor Floral: Use a wet brush and a few drops of polish to create a soft, watercolor effect. Paint a floral pattern, allowing the colors to blend and merge.
- Spring Leaf: Use a combination of green and yellow polish to create a stylized leaf design. Add some subtle shading and texture to give the leaf a more realistic appearance.
- Butterfly Kiss: Paint a delicate butterfly on each nail, using a combination of pastel shades and bold black lines. Add some subtle shading and texture to give the butterfly a more lifelike appearance.
- Garden Gate: Create a whimsical garden-inspired design by painting a miniature gate on each nail. Use a combination of green and brown polish to create a rustic, weathered look.
Tips and Tricks for Creating Beautiful Spring Nails
Here are a few expert tips to help you achieve salon-quality results at home:
- Use a Nail Art Brush: Invest in a good-quality nail art brush, which will allow you to create fine details and intricate designs.
- Practice Makes Perfect: Don’t be discouraged if your first attempts at nail art don’t turn out as expected. Practice makes perfect, so keep trying until you achieve the look you want.
- Clean Up as You Go: Use a cotton swab or a nail polish remover to clean up any mistakes or smudges as you go. This will prevent polish from drying and making a mess.
- Seal with a Top Coat: Finish off your design with a clear top coat, which will help protect your polish and add shine to your nails.
Spring Nail Art Trends to Watch
This season’s hottest nail art trends are all about embracing the beauty of nature. Here are a few styles to watch:
- Botanicals: Inspired by the intricate patterns and colors of flowers, botanical nail art is all about creating realistic, detailed designs.
- Geometric Florals: Combine geometric shapes with floral patterns to create a unique, eye-catching look.
- Negative Space: Use negative space to create a bold, modern look that’s perfect for spring.
- Chrome Nails: Add a touch of luxury to your nail look with chrome polish, which gives a mirror-like finish.
Conclusion
Spring is the perfect time to refresh your nail look and try out new, exciting designs. With these easy-to-follow tutorials and expert tips, you’ll be well on your way to creating stunning, professional-looking nails at home. Whether you’re a seasoned nail artist or a beginner, there’s something for everyone in the world of spring nails. So why not get creative, have fun, and show off your unique style? Happy spring, and happy nail-ing!


