“Floral gel nails for spring
It’s the perfect time to refresh your beauty routine and try out a new nail trend. This season, floral gel nails are taking center stage, and we couldn’t be more excited. In this article, we’ll dive into the world of floral gel nails, exploring the latest designs, techniques, and tips to help you achieve salon-quality nails at home.

What are Gel Nails?
Before we dive into the world of floral gel nails, let’s start with the basics. Gel nails are a type of nail enhancement that uses a gel-like substance to create a durable, long-lasting finish. Unlike traditional nail polish, gel nails are cured under a UV or LED light to create a strong, chip-resistant bond. This makes them a popular choice for those who want a high-gloss finish that can last up to two weeks without chipping or fading.
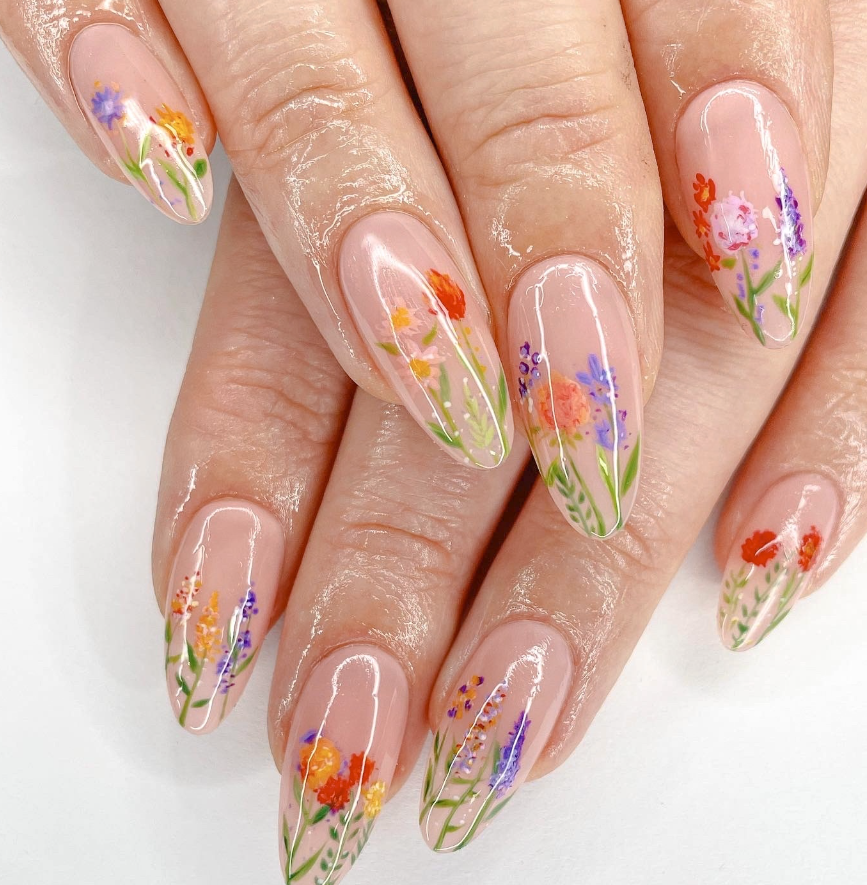
Floral Gel Nails: A Springtime Favorite
Floral gel nails are a seasonal twist on traditional gel nails. Instead of opting for a solid color or simple design, floral gel nails feature intricate, hand-painted florals that evoke the beauty of spring. From delicate cherry blossoms to bold, bright daisies, the options are endless. Whether you prefer a subtle, minimalist look or a bold, statement-making design, floral gel nails are the perfect way to add some personality to your beauty routine.
Design Inspiration: Popular Floral Gel Nail Designs
If you’re looking for inspiration, here are some popular floral gel nail designs to try:
- Cherry Blossom Nails: Delicate pink blossoms against a soft, pastel background are a classic springtime look.
- Daisy Chain Nails: Bright, bold daisies in shades of white, yellow, and pink create a fun, playful design.
- Lily Pad Nails: Soft, watercolor-style lilies in shades of pink and white evoke the beauty of a serene garden pond.
- Floral Wreath Nails: A circular wreath of flowers, leaves, and greenery creates a stunning, statement-making design.
- Abstract Floral Nails: Whimsical, abstract florals in bold, bright colors add a touch of personality to any outfit.
Tips and Techniques: How to Create Floral Gel Nails at Home
While it’s always best to consult a professional nail technician for intricate designs, you can still create beautiful floral gel nails at home with a little practice and patience. Here are some tips and techniques to get you started:

- Invest in a Good Gel Nail Kit: A high-quality gel nail kit should include a UV or LED light, gel polish, and a nail cleanser.
- Prep Your Nails: Before applying gel polish, make sure to clean and shape your nails. Remove any oils or lotions, and gently buff the surface to create a smooth finish.
- Choose Your Colors: Select a range of gel polishes in soft, pastel shades to create a beautiful, ombre-effect floral design.
- Use a Nail Art Brush: A small, fine-tipped brush is essential for creating intricate floral details.
- Practice, Practice, Practice: Don’t be discouraged if your first attempts at creating floral gel nails don’t turn out perfectly. Practice makes perfect, and you’ll soon get the hang of it.

Step-by-Step Guide: How to Create a Simple Floral Gel Nail Design
Here’s a simple, step-by-step guide to creating a beautiful floral gel nail design at home:
- Apply a Base Coat: Apply a thin layer of clear gel polish to each nail to create a smooth, even surface.
- Paint the Background: Use a soft, pastel shade to create a subtle background color. Apply two thin coats, allowing the first coat to dry completely before applying the second.
- Create the Florals: Using a nail art brush, paint a small floral design in the center of each nail. Start with a simple shape, such as a circle or oval, and add delicate details like petals and leaves.
- Add Shadows and Dimension: Use a darker shade of gel polish to add depth and dimension to your florals. Apply a small amount of polish to the center of each flower, and blend gently with a nail art brush.
- Seal with a Top Coat: Apply a thin layer of clear gel polish to seal your design and add a high-gloss finish.
Common Mistakes to Avoid
When creating floral gel nails at home, there are a few common mistakes to avoid:
- Applying Too Much Polish: Too much polish can lead to a thick, uneven finish. Apply thin coats, allowing each coat to dry completely before adding more.
- Not Prepping the Nails: Failing to clean and shape your nails before applying gel polish can lead to a rough, uneven finish.
- Not Using a UV or LED Light: Gel polish needs to be cured under a UV or LED light to create a strong, chip-resistant bond. Don’t skip this step, or your polish may not last as long as you’d like.
Aftercare: How to Make Your Floral Gel Nails Last
To make your floral gel nails last, follow these simple aftercare tips:
- Avoid Using Harsh Chemicals: Exposure to harsh chemicals, such as detergents or cleaning products, can weaken the gel polish bond and cause it to chip or fade.
- Keep Your Nails Moisturized: Apply a rich, nourishing cuticle oil to your nails and cuticles to keep them hydrated and healthy.
- Avoid Biting or Picking: Biting or picking at your nails can damage the gel polish and cause it to chip or lift off the nail.
- Touch Up Your Nails: If you notice any chips or scratches, touch up your nails with a small amount of gel polish to keep them looking their best.
Conclusion
Floral gel nails are a beautiful, seasonal way to add some personality to your beauty routine. With a little practice and patience, you can create stunning, professional-looking designs at home. Whether you opt for a simple, delicate floral or a bold, statement-making design, floral gel nails are the perfect way to welcome the beauty of spring. So why not give them a try? With these tips, techniques, and design inspiration, you’ll be well on your way to creating beautiful, long-lasting floral gel nails that will make you feel confident and beautiful all season long.


